|
By Marian Mihok
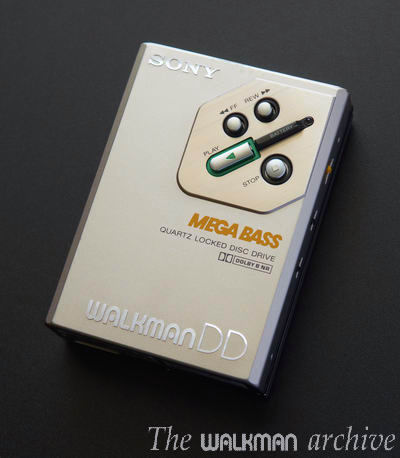
Sony DD series (direct drive) walkmans are very popular among portable cassette players because of their high quality construction, excellent fully analog sound quality - and great timeless design.
Although they’re well built, they will not work within specs without proper service. Because they’re 30+ years old, most of them will have some common issues by now.
In this manual I will give very detailed step-by-step instructions on how to fix all common problems - and recommendations on maintenance tasks to do, to avoid future problems. With the help of this manual you should be able to do proper service on any DD unit. I’ve fixed more than 200 DD units and will present my know-how and best practices, discovered through the years. I will try to make it as complete as possible.
This manual is suitable for everyone with at least basic technical skills. Experienced technicians will also find useful information here.
What skills do you need?
- You need to have at least basic soldering skills
- You should know how to work with basic hand tools
- You need to be patient and never use strong force to open or dismantle anything.
What tools do you need?
Just simple and easily available tools. I will describe them later.
What models are covered?
- WM-DD / DDII / DDIII
- WM-DC2
- WM-DD30 / DD33 / DD100
- WM-F5
- WM-D3
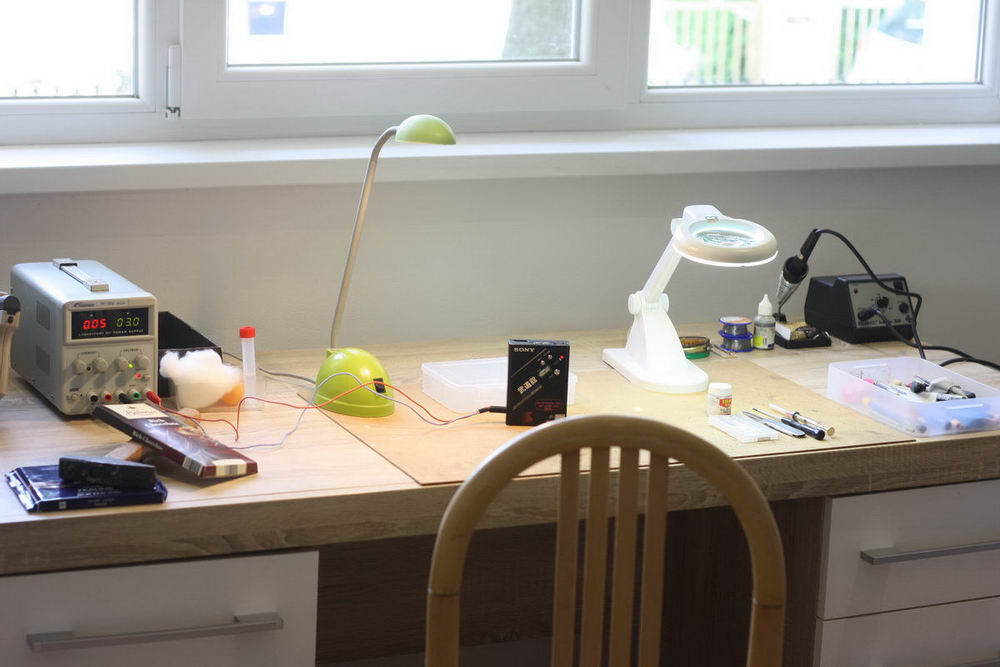
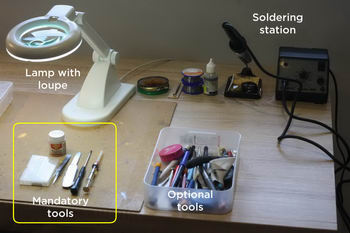
Workbench
The key to success is to prepare a workspace where you will work. It must be clean - if you loose some small part, you will find it easier. All tools and devices must be well organized and should be readily at hand.
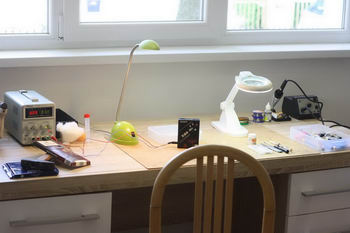
This is how my own workbench looks.
Tools needed
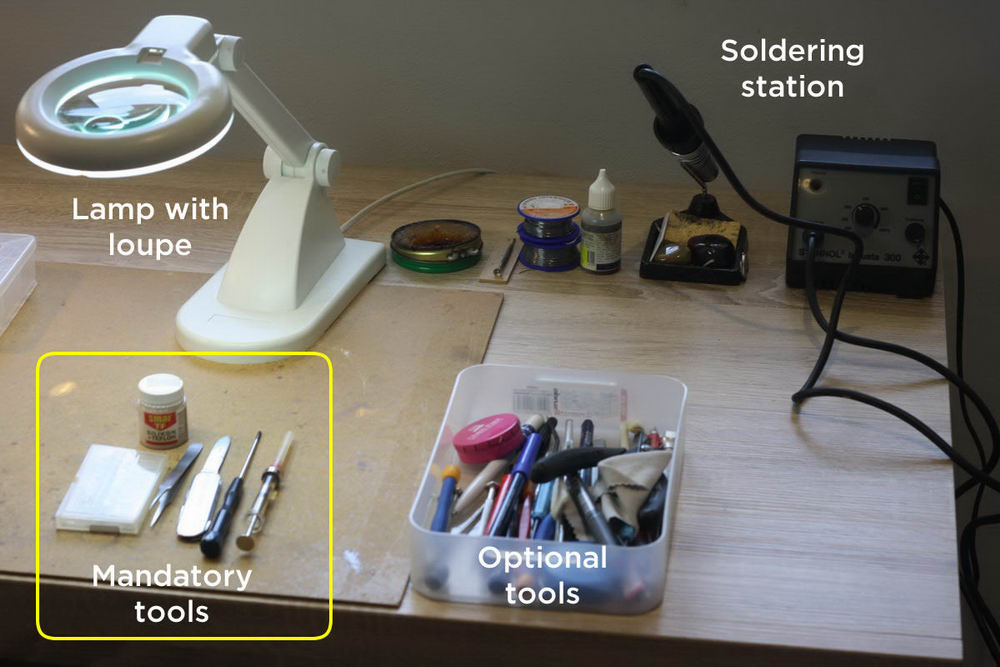
Mandatory tools:
All needed tools are easily available at low prices from eBay or Aliexpress.
- precision tweezers
- screwdriver: Philips type PH00. Use high quality to avoid damaging screws. I use Vessel
- Oil: synthetic oil that dries very slowly, like high-grade watch oil, 702 for example
- Vaseline: there are special types for plastic and for metal
- pocket knife: the thinner the blade, the better
- IPA (Isoprophilic Alcohol): for cleaning
- Cotton wool: for cleaning
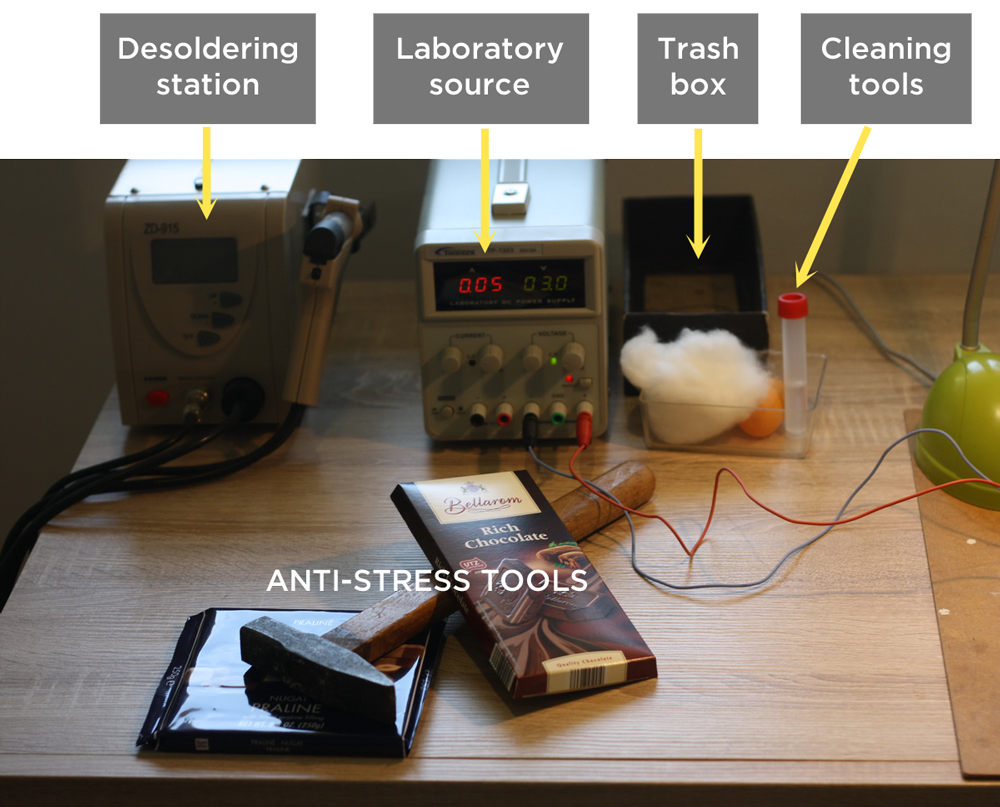
- soldering station and accessories, or simple soldering iron
- External power source: a 3V power supply or 2x1.5V AA battery pack, with the right connector and right polarity
- Organizer
- 2mm carbide end mill engraving bits
- Lamp with magnifying glass
Optional tools, according to situation
- Scissors
- Textile duct tape and double-sided duct tape
- Drills
- Pliers
- Small hammer
- Other tools as needed

This is how my own workbench looks.
This is how my own workbench looks.
Getting inside the walkman
1.- Remove the front door
Unscrew the two screws holding the door from their hinges, one on each side, and remove the front door. Be careful not to break the hinges, they’re very fragile. If they’re already broken - proceed to the “Fixing broken hinge” chapter. If the transparent plastic window on the door is loose - proceed to the “Fixing loosened window” chapter. If the door lock slider is broken - proceed to the “Fixing broken door lock” chapter.
Put the screws in safe place - e.g. a small cup or tray.
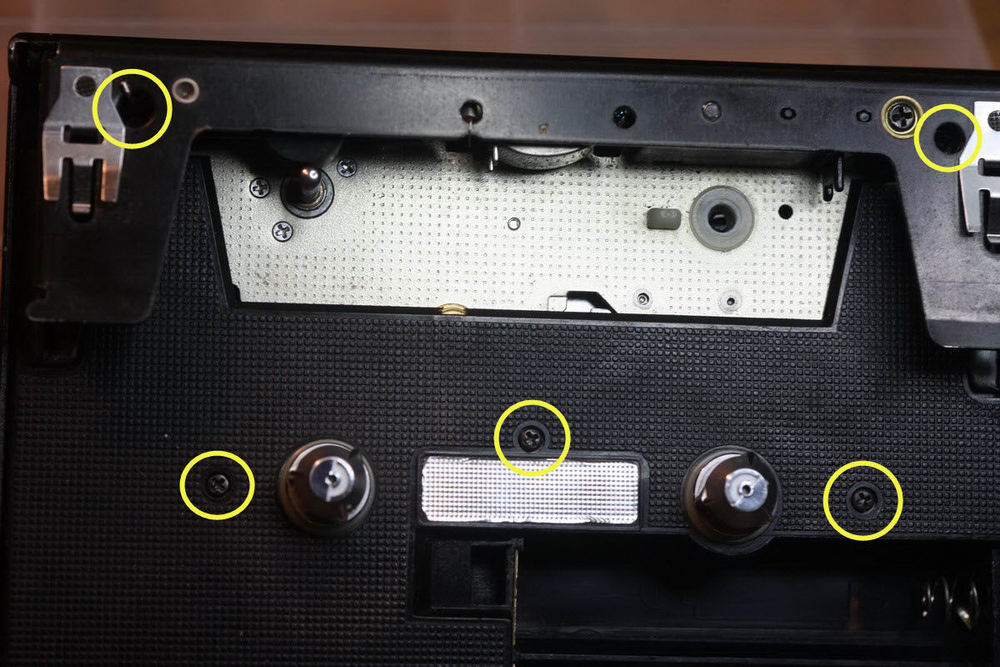
2. Tighten five screws located in cassette compartment
Many times they have become loose and need to be tightened. Sometimes they’re missing. These are standard M1.4 screws, easily available from eBay.

3. Remove the back cover
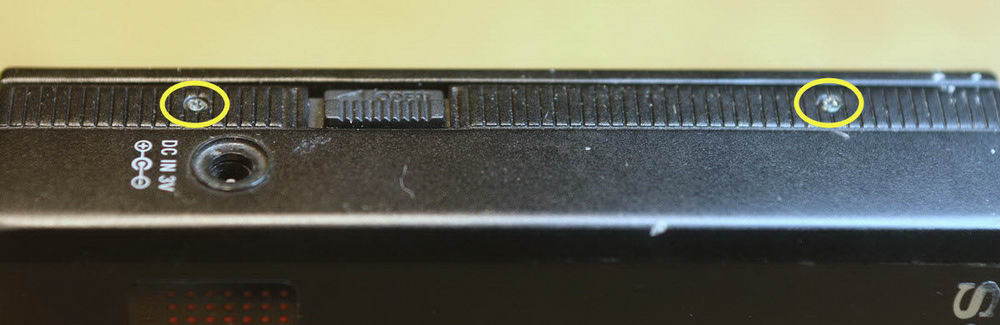
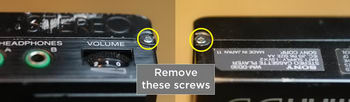
Unscrew the four screws on the sides of the walkman, two on one side and two on the opposite side.


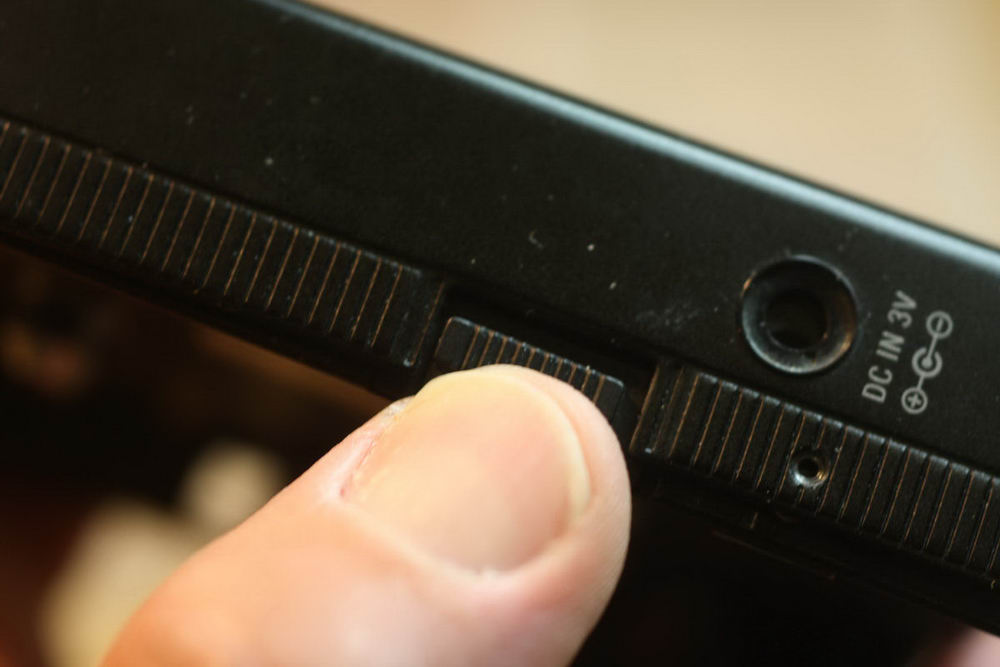
Then pull out the back cover. Start from the empty side. Be very careful, there is a spring located under the door lock slider. Do not lose this spring! Hold the slider with your fingers while releasing the back cover. Otherwise the slider will jump out, together with this small spring. Secure slider and spring with a small piece of tape before proceeding.

If you have trouble removing the back cover, push the FF and REW buttons simultaneously,
while trying to lift the back cover away. Never use strong force to open anything.
|